We've finally settled into our new place (for now) and I have actually completed a project....or two.
I'll start with a quick once around my new craft space (Which triples as our office and dining room due to the nifty linoleum floors and limited house space). This room is actually what is considered the den in our little abode.
 |
| The colorful all purpose craft/dinner table. We actually added a roll of white craft paper to the table many years back, you can see it and the standard pipe we used to create the hanging device. Love this table but it may be time to update the color of it. |
 |
| Book case for storing various items, my yarn and sewing bins (My sewing machine is still packed in its box by the computer desk until we purchase something to put it on, like a rolling kitchen island, maybe.), clothes line to display some projects and kids' art, computer desk and appropriate gadgets. |
 |
| My jar storage that my husband was so awesome as to help me create out of pickle jars I had been hoarding, a makeshift shelf on my table created out of a broken drawer front and some tin cans I hot glued to it as feet, and of course my girls' re-purposed crib spring (My youngest was a beaver and chewed on the sides so much I figured it wasn't worth passing along....the rest of the crib parts will be reused as well at a later date.) storage wall that I can hang things on like bins and other stuff...quite handy and fun. |
 |
| Printer, filing cabinet, Pazzles machine (Awesomeness!), Purple Cows cutter (Love it), paper is stored below the cutter in the brown cabinet, all sorts of craft supplies are in the two white plastic rolling drawers from adhesives, stickers, pens, embellishments, crocheted scrapbook stuff, etc... The plastic bin near my desk and the box on the floor hold scrap paper separated by color and size (smaller stuff is in the box). |
 |
| Where I store my buttons (top shelve in jars), TV, books, cuttlekids, wipes, finished pages I need to put in albums, etc.... |
So that is a quick once around my space.
Okay about that project I have finished (I've finished a few random ones but this one is worth sharing).
Sometime last year I purchased a tutorial from http://www.jannbdesigns.com/ for an Album in a Box Album. I was too lazy to figure out the math myself and thought heck why not buy it since Judy was so kind as to do all of the calculating for me and make it that much easier and less time consuming for me to create. She has wonderful tutorials by the way.
I've made a few of these and gifted them, this one will also end up gifted.
 |
| Super neat and affordable tutorials that you can print out. |
 |
| The beginning of this Album in a Box. |
 |
| The Album before it is "Box"ed |
 |
| The cover which will turn this album into a box |
 |
| Yay! It is box form now and also doubles as a nifty built in display stand. |
 |
| The spine. |
 |
| DCWV Floral stack is my finishing paper of choice. |
 |
| Insert for photos and journaling for the album. Make 12 or more if you so choose. |
 |
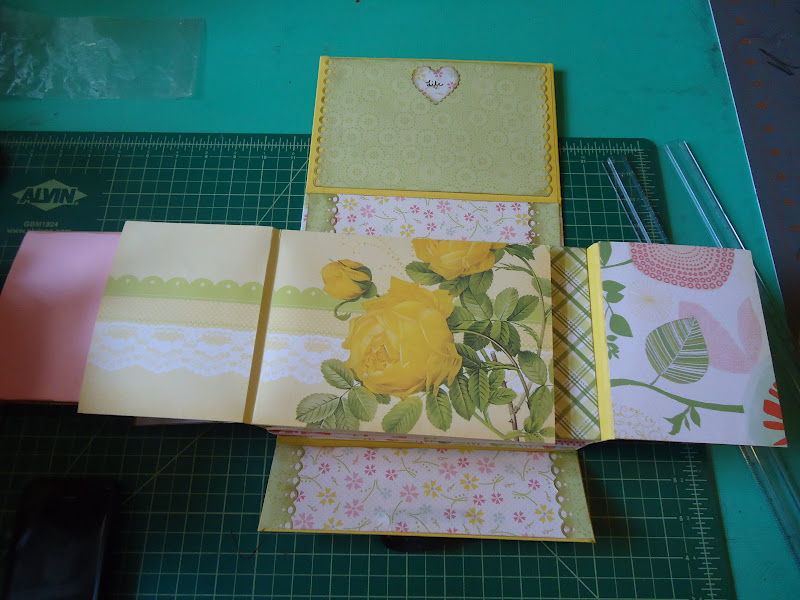
| All papered. |
 |
| It's super colorful and fun. |
 |
| All closed up. |
 |
| All twelve inserts in several variations using the same papers chosen for the Album itself. |
I would show you each and every insert and all the little pull out mats/journal spots if it wouldn't take a ridiculous amount of pictures to do so but I imagine you get the overall picture.


That book is soooooo cute!!!
ReplyDeleteThanks Temaire, I enjoyed making it.
ReplyDeleteThat albumn in a box is fantastic! I love that. Super creative. I might have to try that sometime when I don't have so much on my to-do list.
ReplyDelete