We love this...as in my daughter and I love this. I purchased this nifty cutter mainly for her use as it is relatively safe and easy to use. The blade stays protected away from fingers and doesn't work unless you use the proper pressure as you are moving across your cutting mat.
It came with a total of 13 blades, two straight, a scoring blade, a perforated blade, 9 decorative blades, a nifty ruler and a pretty useless 4x15 inch cutting mat but the mat isn't why I bought it. I already own a large self healing mat. We purchased it through Amazon.
http://crafts-sewing.hsn.com/purple-cows-freestyle-mouse-cutting-kit_pf-1079361_xp.aspx?&mr:referralID=NA&mr:trackingCode=28C86AD6-FDCB-DF11-92F8-0019B9C04BE4&rdr=1&cm_mmc=Shopping%20Engine-_-Amazon%20PA-_-Crafts%20and%20Sewing-_-1079361
I didn't buy it from HSN through Amazon, I bought it directly from Purple Cows through Amazon but this link takes you to HSN/Amazon. It has a good picture of all you get in the kit. I didn't pay that price though...quite a bit less but I see the price has gone back up a bit.
I read a lot of poor reviews about how people couldn't get it to cut (probably user error, since we, my four year old and I have no problems with it) or that they couldn't tell where the blade is going. Weird since if you look at the mouse there is a small pointed arrow on both the front and back of it showing where the blade will cut and if you use the ruler...the groove in the mouse fits on the hump on the ruler then you know where it is going as well....straight.
I like that we can free style cut with it safely and that if we want a straight cut we can use the ruler. I don't see the ruler getting too much use as this is mainly for my munchkin and straight lines and cuts really are not something she worries about.
All of the decorative blades are fun and a huge plus, they also give a much cleaner cut than my decorative scissors. The munchkin loves all of the blades even if she isn't allowed to change them. They really are super easy and quick to take out, which I like.
This is definitely going to free me from having to do so much cutting for her, though it still requires my supervision as it is a blade...even safety scissors are supervised by me, at least it lets my kid take more control of her projects.
Teach your kids how to safely use or be around any and all things dangerous. Simply saying no is not the right way to teach them. I have taught my kids well. They know what they can and can not use, what they can use but with supervision only and what is always available for use even if I am not around. I do keep my craft room locked when not in use, for safety, as there are several sharp instruments in there and for my own sanity as my kids have a tendancy to create some seriously amazing messes but they know that all they have to do is ask and it shall be. Our craft room is our haven, our place to learn, explore, play, and just be and we probably spend a quarter of our day in here enjoying what it has to offer.
Wednesday, August 31, 2011
Monday, August 29, 2011
Share the Memories Discount and Coupon Code
I have a code to share for My Memories that I want to share with everyone. It provides a $10 discount off the purchase of the My Memories Suite digital scrapbooking software and a $10 coupon for the online store.
Just copy and paste: STMMMS85802
and SHARE! Pass the code along.
I just got my copy of My Memories Suite and will be posting a review on September 12, 2011 at which time my Giveaway will be opened so that one lucky winner can receive their own FREE copy.
Please check out MyMemories.com and remember to come back on the 12th (subscribe if you haven't already) and enter for your chance to win.
You can find more information on how to enter and when the winner will be announced by clicking on the My Memories Suite Giveaway tab next the Home tab at the top of my blog.
Sunday, August 28, 2011
My Yarn Wreath Completed
The wreath is finished. Here it is.


 Sorry, the extreme glare prevented me from taking a photo straight on.
 What think thee of my handmade wreath? It came out pretty stellar if I do say so myself, and I do. LOL!

It really doesn't look so wonky any more.


Saturday, August 27, 2011
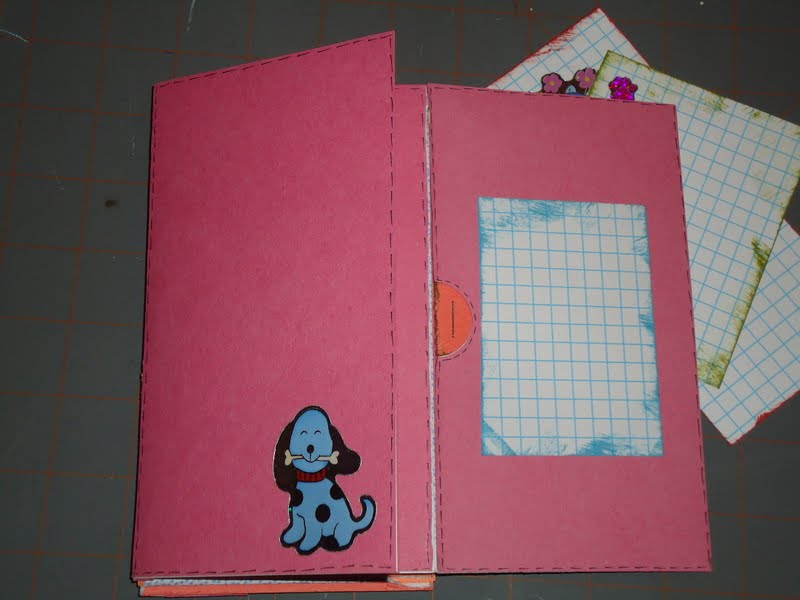
Many Flips Envelope Album
My first attempt. I am figuring out how to do this. This is a demo one, hence the cheap-o stickers and construction paper. It still turned out cute but there are some minor technical things I would have to address like the exact folds and leaving enough room for expansion when the decorative paper is added so as not to split the seams.
It would be easier to fully get the idea of how it works, I imagine, in person.


I hope that wasn't too confusing. As for a tutorial, maybe another day.
It would be easier to fully get the idea of how it works, I imagine, in person.


 |
| Flipping it open by opening the front cover to the right will get you this. |

 |
| Open to the right and you get the pink. |
 |
| Open to the left and you will get the main orange section. |
 |
| The back |
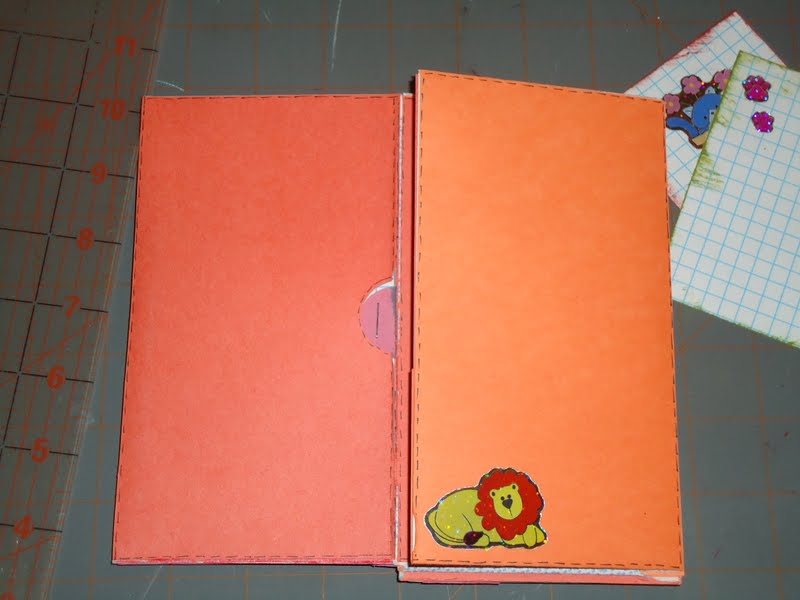 |
| Opening the main orange section. |


 |
| If you flip over the main orange section opened you will see it like this. |
 |
| Opening the back orange by pulling the short ones to the front will look like this. |


 |
| The back looks like this if you just lift the two short orange flaps. |
Wednesday, August 24, 2011
Yarn Wreath
I decided to try my hand at a yarn wreath. I found a wicker/wood 18 inch wreath for a buck at a dollar store and then went from there. I have seen so many different kinds of wreaths but the ones that I really thought were pretty neat are the yarn ones.
Okay, so my wreath is a braided wood something or other wreath that is not quite round as it is made from natural materials but I figured, what the heck, it can't hurt if my Autumn wreath is a little wonky. It will only add to the handmade appeal (or so I tell myself).
I can never find large foam wreath forms and what I do find generally isn't very cheap. I often wonder where people find their wreath making supplies without breaking the bank (their budgets are obviously larger than mine...lol).
Okay.
The supplies are simple.
You will need a wreath form and apparently according to me it can be any crazy shape you want.
You will need batting. You can pick up batting for cheap from Wally's (Walmart) for about six bucks. The crib size will do several wreaths easily.
You will need yarn of your choice. One skein about 360 yards long was more than enough and I wrapped an 18 inch wreath.
Also a hot glue gun and glue sticks. Oh, if you are using a foam form your glue and glue gun will need to either be low temp so as not to melt it or some Tacky glue (quick dry would be best).
I used to strips of batting about four inches wide and the length of the sheet of batting. You start by hot gluing one end of your batting to your wreath form and evenly wrap it around, adding more batting by gluing it on where the last one ended, until you have evenly covered the wreath. The batting adds a little more mass to the wreath. It also makes your wreath more uniform if say it is a wood one like mine was.
Once you have your batting on, you can glue the start of your yarn to your wreath and begin wrapping. I can't say as how long this will take because your wreath size, how tightly and quickly you wrap, and the type of yarn you use will determine this. I just wrapped on and off throughout the day as chores and kids allowed. It seemed to go pretty quickly.
I have yet to decide on my embellishments or even to purchase them. That is for another day, maybe one in September, after I hit up Joanns or Micheals. I am quite happy with my wreath so far. It looks organic and with the batting and being wrapped it isn't as obvious that the circle isn't true. I think once the embellishments (maybe a bird and some fall leaves and berries) get put on, it won't be noticable at all.
I realize I am notoriously bad at taking photos until I am a good deal into my projects. I may have to start leaving my camera out in my craft space so it can be a reminder. Ahhh, the bare wreath wasn't anything special, just a typical braided wood wreath. I am not even sure what type of wood as the tag did not say.


 My wonky wreath in progress. I think it will look great when it is fully embellished.
Okay, so my wreath is a braided wood something or other wreath that is not quite round as it is made from natural materials but I figured, what the heck, it can't hurt if my Autumn wreath is a little wonky. It will only add to the handmade appeal (or so I tell myself).
I can never find large foam wreath forms and what I do find generally isn't very cheap. I often wonder where people find their wreath making supplies without breaking the bank (their budgets are obviously larger than mine...lol).
Okay.
The supplies are simple.
You will need a wreath form and apparently according to me it can be any crazy shape you want.
You will need batting. You can pick up batting for cheap from Wally's (Walmart) for about six bucks. The crib size will do several wreaths easily.
You will need yarn of your choice. One skein about 360 yards long was more than enough and I wrapped an 18 inch wreath.
Also a hot glue gun and glue sticks. Oh, if you are using a foam form your glue and glue gun will need to either be low temp so as not to melt it or some Tacky glue (quick dry would be best).
I used to strips of batting about four inches wide and the length of the sheet of batting. You start by hot gluing one end of your batting to your wreath form and evenly wrap it around, adding more batting by gluing it on where the last one ended, until you have evenly covered the wreath. The batting adds a little more mass to the wreath. It also makes your wreath more uniform if say it is a wood one like mine was.
Once you have your batting on, you can glue the start of your yarn to your wreath and begin wrapping. I can't say as how long this will take because your wreath size, how tightly and quickly you wrap, and the type of yarn you use will determine this. I just wrapped on and off throughout the day as chores and kids allowed. It seemed to go pretty quickly.
I have yet to decide on my embellishments or even to purchase them. That is for another day, maybe one in September, after I hit up Joanns or Micheals. I am quite happy with my wreath so far. It looks organic and with the batting and being wrapped it isn't as obvious that the circle isn't true. I think once the embellishments (maybe a bird and some fall leaves and berries) get put on, it won't be noticable at all.
I realize I am notoriously bad at taking photos until I am a good deal into my projects. I may have to start leaving my camera out in my craft space so it can be a reminder. Ahhh, the bare wreath wasn't anything special, just a typical braided wood wreath. I am not even sure what type of wood as the tag did not say.


Thursday, August 18, 2011
Super Star Chill 12x12


Monday, August 15, 2011
Clean and Crisp 12x12
This type of page, clean and crisp, is much more my style of scrapbooking. I even crocheted the bright green trim that I used.
I wanted a very subtle title so I chose to simply make the background paper do the job since rock star is already printed on it. I just made it stand out a little more.
Close up of the trim that I crocheted. Crochet ain't just for old ladies.
Oh! as for my last post. I couldn't leave that page alone....so I did this.
 I think that adding a title with black glossy chipboard helped create more balance and make the page feel more complete. I also added some glitter glue in gold along the butterfly strips and around the yellow fabric. It isn't dry yet at the time I took this photo. I do think this page looks much better now. What do you think?
 |
| My youngest playing with a plastic kazoo (I think that is what the thing is called). |
 |
| I took a yellow gloss pen (mimics embossing) and outlined the Rock Star that was already on the paper. |
 |
| Crocheted a border/trim with some bright green acrylic yarn. |
Oh! as for my last post. I couldn't leave that page alone....so I did this.

Attempt at Bling-age on my 12x12
 |
| Exhibit A. I feel like there is just too much background showing. |
 |
| Trying to add some texture with thread...mmmmhh. |
 |
| The butterflies and frame were actually cut from the cover of the Mariposa Stack by DCWV and gems added. |
 |
| some button embellies |
I guess this page will just live as it is and I will try again. It isn't terrible but not the look I really ultimately wanted.
Sunday, August 14, 2011
Show and Tell 12x12
I created a star template a few weeks back at the request of my oldest. She wanted to use it to stamp out a background for a picture (her creativity surprises and continually inspires me.) and it turned out really well. I was going to post a picture of her work but can not find it. I suspect her younger sister got a hold of it. Alas back to the template.
I decided to try my hand at using my daughter's star template but instead of using ink (I don't stamp much myself but my daughters have a good selection just not the colors I was looking for) I opted for chalk. Although it is advisable to have a fixative so you don't smear your chalked background before you get to work on it.
 This is my finished page. I used the template and several colors and created my own star background. I also used my fine tip sharpies to write out little phrases I like near the stars. My camera didn't pick up how glittery the background is. I used a glittered chalk. It looks so much nicer and sparkly in person. I really should have taken the pics near my window but didn't even think to until right now.
I have a tendency to keep my pages pretty simple, even though I really love the look of the messier, crowded, blinged and embellished out pages. I just can't seem to do it myself. I also have a hard time trying to create pages where your pictures sort of look like they were just randomly dropped on the page. I can't get away from straightening everything. I am working on expanding my style but it is hard to break habits.
I may add a journal spot and write out a message to my kid but I am not sure about how I will go about it. Lately I have been thinking about my pages a little too much and not just letting them happen. I think they come out a lot cooler if I just relax and let them be. I seem to have lost some of my momentum. Oh to get it back.
SOMETHING EXTRA
I thought this was so funny and cute. My daughter has quite an imagination. She tells me I am going to have to write out what she wants to say on it which is, "Dear Daddy, I love you and got this picture for you. You need to laugh at is because it is so silly. *heart* " and then she will sign her name.
Hope everyone has a good day.
I decided to try my hand at using my daughter's star template but instead of using ink (I don't stamp much myself but my daughters have a good selection just not the colors I was looking for) I opted for chalk. Although it is advisable to have a fixative so you don't smear your chalked background before you get to work on it.

 |
| That first circle is driving me crazy being a little off from the rest. I am trying to ignore it. LOL! |
 |
| I may go back and add some glitter glue to the outline of each of the stars...we'll see. |
SOMETHING EXTRA
 |
| My oldest is working on this monster picture so we can ship it to her dad (he's deployed). |
Hope everyone has a good day.
Tuesday, August 9, 2011
Altered Book in progress.
Okay, it has been a while. Longer than I thought since I last posted but here is something new.
I took an old Calculus book (and it is really old. Printed in '80) that I have had lying around and decided to alter it. It is a really good sized book with tons of potential as a journal/album/collage art book.
I cut out all but a quarter of the pages leaving about a 1/4 inch of the pages near the spine so that I can add in other paper pages if I want to. I then painted it a sand white color with some acrylic paint.
It is necessary to take out so many pages because as you alter/paint the ones left or add others the book will bulk right back up.


 |
| See how I cut out random chunks of the pages. I did this through out the entire book. |
 |
| I glued groups of three or four pages together to make thicker, tougher pages to paint/collage/alter. |

 | |||
| All the pages glued. This took a while. Okay quite a while. |


 |
| This is the big missing page gap I filled with the pocket. |
 |
| Book with pocket in it. |


 |
| Back inside cover. |
 |
| I have been going through and giving a generic base paint in various colors throughout the book to ready the pages that are not patterned paper inserts to create a base from which to work. |
 |
| Added some patterned card stock and paper. You can also see the pocket here. |


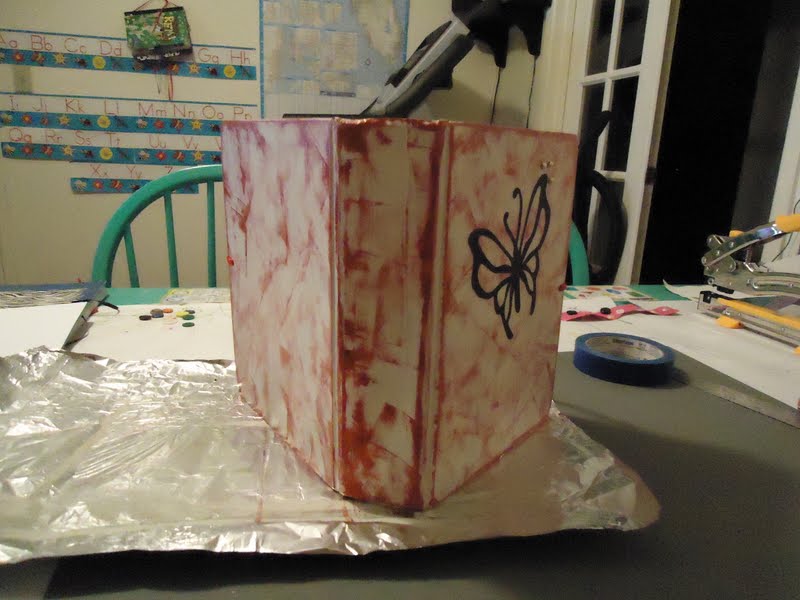 |
| Really simple outside and front cover. There is room for the recipient to still do more of course but if they choose not to it still looks finished. |
I am about half way through base painting the interior calc pages and inserting the patterned paper. I plan to put some mats, tags, and pockets for tags and notes in on random pages. I will probably write out a few questions and leave space to answer them. But for the most part this book will need its owner to really bring it to life.
Subscribe to:
Posts (Atom)